
Table of Contents
This is a collaborative post.
Getting salon-worthy lashes doesn’t require a professional appointment or a hefty price tag. With the right tools, a little patience, and a clear technique, you can apply natural lashes at home and have them look just as polished as anything a lash artist would do. Whether you’re new to falsies or just looking to sharpen your skills, this guide walks you through every step, from gathering your supplies to making your lashes last all day. Let’s get into it.
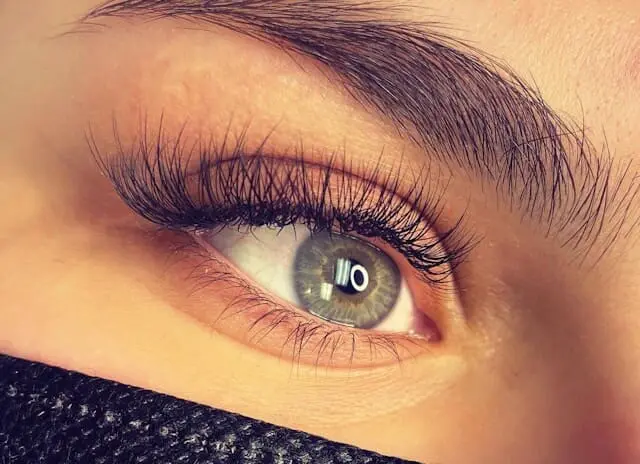
What You Need Before You Start
Before you even think about touching your eye area, you need the right tools laid out and ready. Trying to apply natural lashes without the proper supplies leads to frustration, poor placement, and a look that falls apart by noon.
The Essential Tools for a Clean Application
You’ll need a pair of false lashes, lash adhesive, a lash applicator or tweezers, small scissors, a mirror with good lighting, and a clean makeup brush or cotton swab. A magnifying mirror is especially helpful if you’re still building confidence with the process. Each tool plays a specific role, so skipping any of them tends to affect the final result.
Choosing the Right Lash Adhesive
Not all glues are created equal. Look for a latex-free adhesive if you have sensitive skin, and always check that it’s ophthalmologist-tested. A glue with a slight tack time, meaning one that gets a little tacky before you press the lash down, gives you better control over placement. Clear-drying formulas work well for daytime, natural looks.
Understanding Natural Lashes in Different Lengths
False lashes come in a wide range of styles, and understanding natural lashes in different lengths helps you pick the right fit for your eye shape and the occasion. Shorter lash styles blend seamlessly with your real lashes for an everyday look, while medium-length options add definition without looking overdone. Knowing your options before you shop saves time and prevents the frustration of buying something that doesn’t suit your eye shape.
How to Prep Your Natural Lashes for Application
Preparation is what separates a lash that lasts all day from one that peels off by lunchtime. Your natural lashes and eyelid need to be clean and ready before any adhesive touches your skin.
Remove All Oil and Residue From Your Lash Line
Oil is the enemy of lash adhesive. Even if you don’t think your skin is oily, there’s likely a natural film along your lash line that will break down the glue over time. Use a gentle micellar water or oil-free makeup remover on a cotton swab and run it along your lash line before you start. Let the area dry completely before moving on.
Curl and Mascara: What to Do First
If you plan to curl your natural lashes, do it before the application. Curling after you’ve attached false lashes can damage both the falsies and your real ones. As for mascara, apply a single coat to your natural lashes first. This creates a subtle base that helps the false lashes blend in rather than sit on top of them like a separate layer.
Measuring and Trimming the Lash Band
Place the lash strip across your eye before you apply any glue. Hold it up to your lash line and compare the length to your eye. Most strips are too long for the average eye, so trim from the outer edge to match your eye’s width. A lash band that extends past your outer corner will lift throughout the day and look unnatural.
How to Choose the Right Lash Style for a Natural Look
The false lash market is full of options, and it can be overwhelming if you don’t know what you’re looking for. But, narrowing it down to a natural look actually simplifies the process quite a bit.
Lash Styles That Mimic Real Lashes
For a natural look, stick with styles that have a thin, flexible band and individual or wispy clusters of fibers rather than a thick, uniform line of fibers. Styles labeled as “natural,” “everyday,” or “wispy” are good markers to look for. Lashes with varying fiber lengths look more lifelike because your real lashes don’t all grow to the same length either.
How Eye Shape Affects Lash Choice
Your eye shape matters more than most people realize. Almond-shaped eyes work well with most styles. Round eyes benefit from lashes that are longer in the center to elongate the look. Hooded eyes do better with lashes that have more volume at the outer corners, which lifts the appearance of the lid. Hence, knowing your eye shape before you buy helps you avoid styles that work against your natural features.
Synthetic vs. Mink-Style Lashes for a Natural Finish
Synthetic lashes tend to have a shinier finish, which can look less natural in daylight. Mink-style or silk lashes, on the other hand, have a softer, more matte finish that mimics real lash texture closely. If a natural finish is your priority, mink-style or faux-silk options are worth the extra investment.
Step-by-Step: Applying Your Lashes at Home
Now comes the part most people find tricky at first. The good news is that with a steady hand and the right technique, the process becomes second nature after a few tries.
Applying the Adhesive and Positioning the Lashes
Apply a thin, even layer of lash adhesive along the entire lash band. Less is more here: too much glue creates a messy application and increases the chance of the strip slipping around. Wait about 30 to 45 seconds for the glue to reach a tacky consistency before you place it. This step is where most beginners go wrong by placing the lash too early, so the wait is worth it.
Use tweezers or a lash applicator to hold the strip and position it as close to your natural lash line as possible. Start from the center of the eye, press down, then gently press the inner corner and outer corner into place. Look downward into a mirror rather than straight ahead to get a cleaner angle on your lash line. Once both lashes are in place, press gently along the band with the tip of your tweezers or a clean fingertip to secure any lifted spots. If the inner corner tends to lift, a tiny dot of extra adhesive applied with a toothpick will hold it down.
How to Make Your Lashes Last Longer (Aftercare Tips)
Proper aftercare keeps your false lashes looking great throughout the day and extends the life of the strips so you can reuse them multiple times.
Avoid Moisture and Oil-Based Products After Application
For at least the first hour after application, keep your lashes away from steam, water, and heavy creams. Oil-based makeup removers, moisturizers, and even some foundations can break down the adhesive bond over time. If you need to touch up your makeup, use oil-free products near the eye area to preserve the hold.
How to Remove Lashes Without Damaging Them
At the end of the day, soak a cotton pad with an oil-free makeup remover and hold it gently over your closed eye for about 20 seconds. This softens the adhesive so the strip lifts off easily without tugging. Never pull the lash strip off dry, because doing so can pull out your natural lashes along with it. Peel from the outer corner inward for the cleanest removal.
Cleaning and Storing Your False Lashes for Reuse
Once removed, peel any leftover glue from the band with your fingers or tweezers. Use a cotton swab lightly soaked in micellar water to clean the fibers and band. Let them air dry completely before placing them back in their original tray or a lash case. Stored properly, a quality pair of false lashes can last up to 20 to 25 uses, which makes them a cost-effective part of your routine.