
Table of Contents
This is a collaborative post.
There’s a particular kind of satisfaction that comes from standing on a patio you built with your own two hands, and it’s a big part of why DIY paving has become such a popular weekend project in backyards across Perth. Laying pavers isn’t complicated, but it does reward patience, because most of the work that actually matters happens before a single paver goes down.
This guide walks you through the whole process, from planning your layout to sealing the finished surface, using the same materials and methods the team at Atlas Paving relies on for professional installs. Grab your gloves and safety glasses, because we’re starting from the ground up.
Plan Your Project and Gather Your Materials
Before you touch a shovel, measure your area and add roughly 10 percent extra for cuts and wastage. Pavers come in plenty of colours, shapes and finishes, so take a bit of time choosing a pattern that suits your house.
Once you know your quantities, gather your materials and tools so you’re not making trips to the hardware store mid-job. You’ll need:
Don’t skimp on safety gear either. Gloves, safety glasses, sturdy boots and hearing protection will earn their keep once the plate compactor and brick saw come out.
Prepare the Site
Mark out the area with wooden stakes and string line, then excavate to a depth that allows for your base, bedding sand and paver thickness, typically 150 to 180mm all up. Build in a slight fall of about 1:80 away from the house so water drains off properly instead of pooling near your foundations.
This is also where you decide between a flexible base and a rigid base. Most home jobs on reasonable soil use a flexible base, simply compacted road base topped with bedding sand. If your block has heavy clay or drains poorly, a rigid base made from a concrete slab is the safer bet, because a flexible base over clay tends to shift and crack pavers as the ground moves. Not sure what your soil is doing? Get a paving supplier to have a look before you order materials.
Lay and Compact Your Base
Spread the road base in layers of roughly 75 to 100mm, dampening each layer slightly, and run the plate compactor over every layer before adding the next. Skipping this step, or rushing it, is the single biggest reason DIY paving jobs end up wobbly within a year.
Keep checking with your spirit level as you compact, because a base that looks flat beforehand can shift once the plate compactor gets to work on it. Once the depth and firmness feel right underfoot, you’re ready to move on to sand.
Screed Your Bedding Sand
Spread washed river sand over the compacted base and screed it back to an even 30mm layer, using two straight pipes or timber battens as guides and dragging a straight edge across the top. Try not to walk on the screeded sand once it’s level, because footprints create low spots that show up as dips later.
It helps to work in small sections rather than screeding the whole area in one go. Keeping 30mm consistent over a couple of square metres at a time is far easier than managing it across an entire patio.
Lay Your Pavers
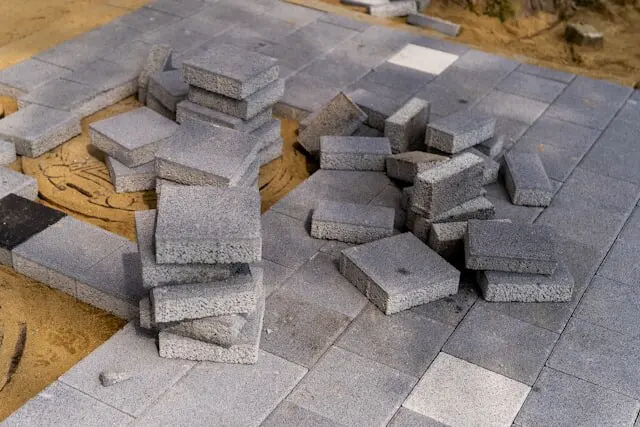
Now for the part that actually looks like progress. Set up string lines along your first row to keep everything straight, then start laying pavers from a corner or straight edge, working outward in your chosen pattern. Herringbone, stack bond and running bond are the most common patterns, and each gives a different look, so lay out a small sample area first if you’re torn.
Leave a small, consistent gap of about 2 to 3mm between each paver for jointing, and check your lines every few rows with the spirit level and tape measure so small errors don’t compound into big ones. When you reach the edges, you’ll need to cut pavers to fit. A brick saw gives clean, straight cuts and is both safer and more accurate than trying to break a paver by hand with a hammer.
Tap each paver into place gently with a rubber mallet rather than forcing it. This beds it into the sand evenly and helps avoid cracking.
Jointing and Compacting
Once every paver is down, sweep gap sand or Pavelock into the joints, working it across the surface with a broom until the gaps are properly full. Pavelock sets harder than plain sand and resists weed growth better, which makes it worth the extra cost if you’d rather not be weeding joints every few months.
Run the plate compactor over the whole surface, ideally with a rubber mat attachment to protect the paver faces, so everything locks together properly. Sweep in more jointing material afterwards to top up any gaps that settle, then hose the area down gently to help it all set.
Seal and Finish
Give the new paving a light clean with a broom and water to remove any leftover dust or efflorescence, the white, chalky residue that sometimes appears on new concrete and paved surfaces as it cures. Let everything dry out fully before applying a paver sealer, which protects against stains, UV fading and moss.
Most sealers need a few weeks of curing time before the paving is ready for regular foot traffic, so plan your first barbecue on the new patio accordingly.
Getting It Right
Laying your own pavers is a genuinely achievable weekend project, as long as you respect the prep work, because a solid base and an even bed of sand do more for the finished result than anything else you’ll do on this job. Take your time with the compacting and screeding stages especially, since rushing those two steps is where most DIY paving jobs come unstuck.
If you’d rather leave the heavy lifting to the professionals, or you just want advice on the right pavers and base for your soil type, get in touch with the team at Atlas Paving before you start digging.